
When plastering walls, it is important that the resulting entire surface of the wall is smooth and strictly vertical. If this is so, then subsequent wall finishing will not be difficult and the result will be excellent. To achieve a perfectly even laying of plaster, a method using beacons is used. This process consists of installing special profiles or slats on the wall, which with their outer edge will form the resulting wall surface. These guides are called beacons.
Do-it-yourself plastering of walls along beacons is as follows.
The primary task is to prepare the surface for plastering. The entire wall is cleaned of dirt and dust. Next, the surface is treated with a primer. It is advisable to use a primer with deep penetration.
 Vertical lines are marked on the wall using plumb lines and a level. The distance between them is chosen to be 20-30 cm less than the length of the rule (the device with which the plaster is applied).
Screws are screwed in along the edges of the marked lines so that the screw heads form a vertical line. Subsequently, the beacons will rest on the caps of the screws. It is important to accurately check the verticality of the resulting line. A thread is pulled over the heads of the screws at the extreme points, and several more screws are screwed in at the resulting level at a distance of about 10 cm from each other. As a result, it should turn out so that in the most protruding place of the wall the screw is screwed in right up to the head, and along all the lines of the head they form a single plane
After aligning the screws, a strip of mortar is laid along the lines and a special beacon profile is applied, precisely resting it along the entire length on the screw heads. There are two types of purchased profiles: with a ridge height of 6 mm and 10 mm. A 10 mm profile is much stronger and easier to work with, however, due to the increase in thickness, the consumption of plaster will also increase significantly.
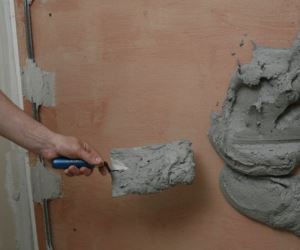
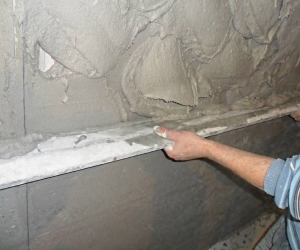 After the solution holding the profile has hardened, you can begin the plastering process itself. The solution is spread onto the wall with a trowel, starting from the bottom. The solution should be leveled using the rule that rests the edges on the beacon profiles.
The result is a smooth surface over the entire wall. If the wall is subsequently finished with tiles, then the profile may not be needed. If wallpaper or other covering is planned, then the profiles are dismantled, and the places where they were located are sealed with mortar, already guided by the level of the finished sections of the wall.
It is necessary to remove the profiles so that subsequently no traces of corrosion appear on the finishing material.